Finding the source of a roof leak starts in your attic, not on your roof. Grab a flashlight, look for water stains, mold, or daylight coming through the decking, and trace the moisture trail uphill from where it appears, since water almost always travels before it drips.
That said, tracking down exactly where a roof leak originates is one of the more frustrating things a homeowner can deal with. The drip on your living room ceiling might be entering your home six feet away through a failed piece of flashing. This guide walks you through how to find it, systematically, safely, and without tearing your house apart.
Homeowners across New Jersey trust us for accurate leak detection and lasting repairs, making us the top choice for reliable, professional NJ roof leak experts.
Why Roof Leaks Are So Hard to Locate?
Before you start hunting, it helps to understand why leaks are deceptive. Water is a traveler. It enters at one point, runs along a rafter or roof deck, and drips somewhere completely different. This is why the stain on your ceiling is rarely directly below the entry point.
In New Jersey specifically, the problem is compounded by the climate. Freeze-thaw cycles, ice dams, heavy spring rain, and nor’easters create multiple stress points on a roof simultaneously, so sometimes what looks like one leak is actually two or three entry points happening at once.
Step 1: Start Inside, Check Your Attic First
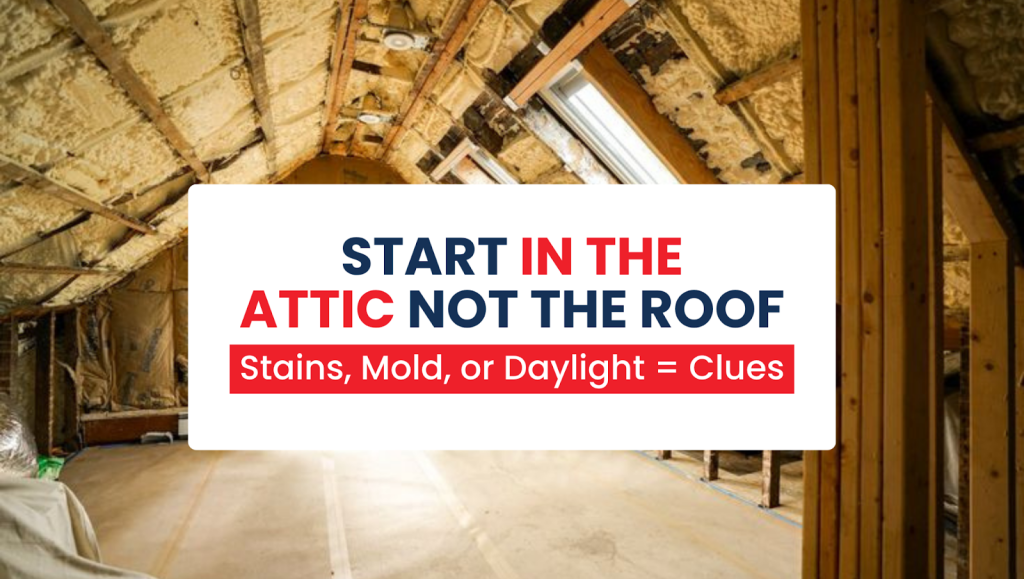
The attic is your best diagnostic tool, and most homeowners skip straight to the roof. Don’t.
Wait for daylight and head up with a bright flashlight. Here’s what you’re looking for:
Water stains on the underside of the roof decking. These show up as dark discoloration or tide marks on the plywood or OSB. Follow them uphill (toward the ridge) to find where water first entered.
Mold or mildew growth, Black or green patches on rafters or sheathing, indicate chronic moisture, not just a one-time event. This tells you the leak has been going on longer than you might think.
Daylight coming through the decking. Any visible light means there’s a gap or hole. These are obvious entry points.
Wet or compressed insulation. Insulation holds water like a sponge. Feel it with your hand. Wet insulation below a dry-looking section means water traveled down before soaking in.
Rust on nail heads, Rusted nails poking through the decking indicate a moisture problem in that area, even if no active drip is present.
Once you find a suspicious area in the attic, mark it; a piece of tape or chalk works fine, and measure its distance from the ridge and from a gable end. That gives you a reference point when you go up on the roof.
Step 2: Inspect the Roof Surface, Know Where to Look
If attic access is limited or the leak is intermittent, you’ll need to inspect the roof itself. You don’t always need to get on the roof; a lot can be seen from the ground with binoculars or a drone if you have one.
Start at the likely suspects, which in NJ homes are almost always one of these areas:
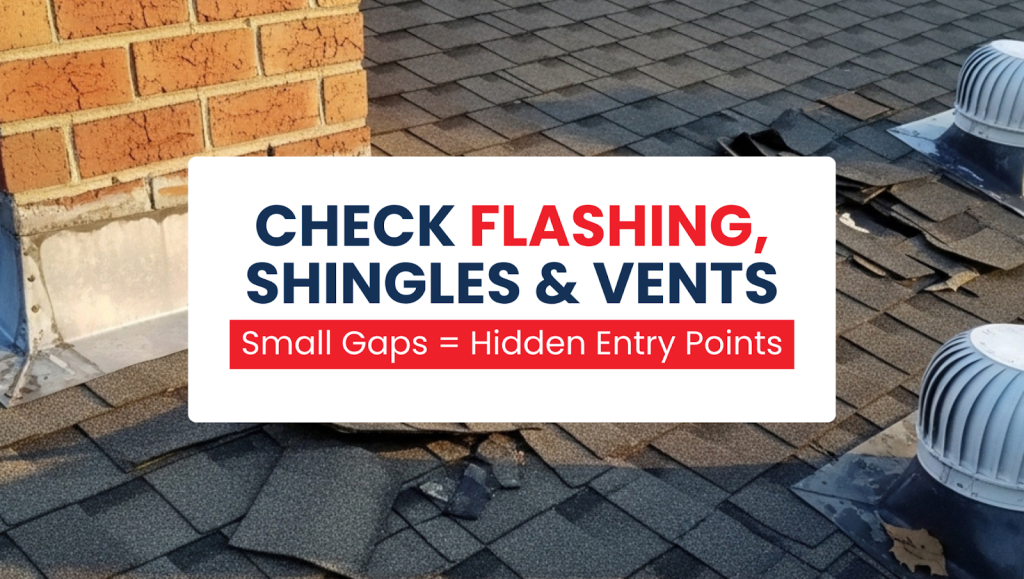
Flashing First
Flashing is the metal sealing around every transition point on your roof, chimneys, skylights, vents, dormers, and valleys. It’s responsible for a disproportionate number of leaks. Look for:
- Flashing that’s pulled away from the surface is sealing.
- Rust, corrosion, or visible gaps.
- Old caulk that’s cracked, shrunk, or missing entirely.
- Step flashing along a chimney that’s lifted or bent.
If your leak shows up near any of these structures inside, flashing failure is your most likely culprit. Our Roof Flashing Repair NJ page covers this in detail.
Shingles Second
Walk the perimeter and scan the roof surface for:
- Missing shingles (obvious patches or gaps)
- Curling edges, shingles curling upward at the corners or edges
- Cracked or split shingles
- Granule loss, leaving shiny, exposed asphalt underneath
- Shingles that look darker or wetter than the surrounding ones after it dries out
Pay special attention to ridges, hips, and any area where shingles were repaired before; these are common weak points.
Pipe Boots and Vent Collars
Every pipe or vent that penetrates your roof has a rubber or metal collar around it. Rubber boots crack and shrink over time, especially with NJ’s temperature swings. If a collar is pulling away from the pipe, water runs right down into your home, and it’s often a slow, drip-by-drip leak that’s easy to miss.
Step 3: The Garden Hose Test, For Stubborn Leaks

If you’ve done the attic inspection, walked the roof, and still can’t pinpoint the source, the garden hose test is the next move. This works best with two people, one on the roof with the hose, one inside watching.
How to do it:
Start at the lowest point of the roof and work your way up in sections. Run water over a small area for several minutes before moving on. Don’t rush; water takes time to travel.
- Have the person inside call out as soon as they see any water movement.
- When they call, stop. You’re within a few feet of the entry point.
- Narrow it down by moving the water stream slowly in that zone.
Key rule: go low before high. Starting at the ridge and working down is a common mistake; you’ll soak the whole roof and never isolate the leak because you can’t tell which section triggered the drip.
Step 4: Check These NJ-Specific Problem Areas
Beyond the usual suspects, New Jersey homes have some region-specific leak sources worth checking:
Ice Dam Damage
If your leak only happens in winter or shows up after a freeze, ice dams are almost certainly involved. The telltale sign is water staining along exterior walls near the eaves rather than the center of the ceiling. Ice dam damage can be subtle; the ice melts, leaves, and the entry point dries out before anyone investigates.
Check the eaves area on your roof for lifted shingles or missing granules along the lower edge. Inside, check for staining just above the exterior wall where it meets the ceiling. Our Ice Dam Repair NJ page goes deeper into diagnosing this.
Chimney Leaks
Chimney leaks are notoriously tricky because water can enter from four or five different points simultaneously: the flashing, the mortar crown, cracked brick, a missing cap, or the mortar joints between brick courses. Inside, chimney leaks show up as staining on walls adjacent to the fireplace, not always on the ceiling directly above it.
If the staining is on the interior wall of the fireplace itself, the chimney cap is the most likely culprit. If it’s on the ceiling, step flashing failure is more likely. See our Chimney Leak Repair NJ page for a full breakdown.
Valleys
The valleys on your roof, where two slopes meet, carry more water per square foot than any other section. Valley leaks are common after heavy rain and often come from deteriorated valley flashing or improperly overlapped shingles. Look for dark streaking running along the valley line on your ceiling.
Step 5: When You Can’t Find It, What to Do Next?
Some leaks are genuinely invisible from a standard inspection. Here’s what that usually means:
Intermittent leaks that only happen under specific wind-driven rain conditions are the hardest to find. The angle of the rain matters; a leak that only appears in a northeast wind doesn’t show up in a standard hose test done from the wrong direction.
Leaks at the wall-to-roof transition on additions and dormers are often hidden behind siding, making them impossible to spot from a standard roof inspection.
Nail pops , roofing nails that back out over time and lift shingles slightly, create tiny entry points that are nearly invisible until you’re looking closely.
At this point, a professional inspection with an infrared thermal camera can identify moisture inside your roof system that isn’t visible to the naked eye. Infrared shows temperature differences caused by wet insulation, making it one of the most accurate diagnostic tools available.
Safety Rules Before You Get on the Roof
This needs to be said clearly: getting on a wet, steep, or damaged roof is dangerous. Every year, homeowners are seriously injured trying to inspect their own roofs after storms.
If you decide to get on the roof yourself:
- Only attempt it on a dry day when the roof surface is completely dry.
- Use proper footwear with rubber soles, no sneakers, no sandals.
- Never walk on a wet or frost-covered roof.
- Keep your weight low and move slowly.
- Never approach the edge without a safety harness or someone spotting you below.
- If the pitch is steep (anything over a 6:12 slope), call a professional instead.
A roof inspection by a licensed NJ roofer typically costs little to nothing compared to the emergency room bill or the cost of falling through a weakened section of decking.
What to Do Once You Find the Leak?
Once you’ve identified the source, or you have a strong suspect, here’s the right sequence:
Temporary protection first. If there’s an active leak, a roof tarp or emergency sealant buys you time. Move anything valuable away from the affected area inside and place buckets strategically.
Document everything. Before any repair happens, photograph the damage from as many angles as possible. This matters for insurance claims, especially if the damage was storm-related. Check out our guide on whether roof leak repair is covered by homeowners’ insurance in NJ before you call your insurer.
Get a professional inspection in writing. A licensed roofer’s written scope of damage is your best tool for both repair planning and insurance purposes.
Don’t let it sit. Water damage compounds fast, within 24 to 48 hours, and wet insulation, drywall, and wood framing can begin to develop mold. What starts as a $400 flashing repair can become a $4,000 structural problem if ignored.
When to Call a Professional Roofer?
Call a roofer, don’t just patch it yourself, if:
- You’ve done the attic inspection and can’t locate the source.
- The leak is near the electrical wiring or a light fixture.
- The ceiling is sagging, bubbling, or feels soft.
- The water stain keeps growing even after dry weather.
- You suspect ice dam damage or chimney involvement.
- The roof is steep, high, or shows signs of structural damage.
Temporary DIY patches have their place, but if you seal the wrong spot, the water finds another path, and now you’ve got two problem areas instead of one.
The Bottom Line
Finding a roof leak in a NJ home takes patience and a methodical approach: attic first, then roof surface, then targeted water testing. Start at the obvious suspects (flashing, pipe boots, shingles), account for NJ-specific issues like ice dams and freeze-thaw damage, and don’t assume the leak entry point is directly above where the water shows up inside.
If you’ve worked through these steps and still can’t pinpoint the source, or if what you find is beyond a simple DIY fix, get a professional inspection before the next rainstorm makes it worse. The sooner a leak gets properly diagnosed, the smaller the repair bill.
Content provided by NJ Roof Leak Experts.