If your roof is actively leaking right now, do these five things immediately: move valuables and electronics away from the affected area, place buckets to catch dripping water, puncture any ceiling bubbles to release pooled water in a controlled way, take photos and video of all damage, and call a licensed NJ roofer for emergency service ,in that order.
The next hour matters more than most homeowners realize. Water doesn’t wait. Every minute an active leak runs unchecked, it’s soaking deeper into insulation, spreading further along ceiling joists, and getting closer to your electrical system. The difference between a $500 repair and a $5,000 remediation job is often how quickly someone acted in the first hour.
This is not a guide for later. Read it now, act on it now, and refer back to the details as you go.
First: Stay Calm, Then Move Fast
Panic leads to bad decisions. The ceiling isn’t going to collapse in the next five minutes. You have time to do this right, but not time to waste.
The single most important thing to understand about an active roof leak is that what you’re seeing on your ceiling is never the full picture. By the time water drips visibly into your living space, it has already traveled through the roof deck, soaked through insulation, and spread laterally along ceiling framing, often for several feet in every direction from the visible drip point. You’re seeing the end of the journey, not the beginning.
That context shapes every action you take in the next hour. Also, Homeowners dealing with persistent leaks or storm-related damage should consider professional Roofing Services in Glendale, CA, to identify hidden moisture issues before they lead to costly structural repairs.
Minutes 0–10: Protect Your Home and People
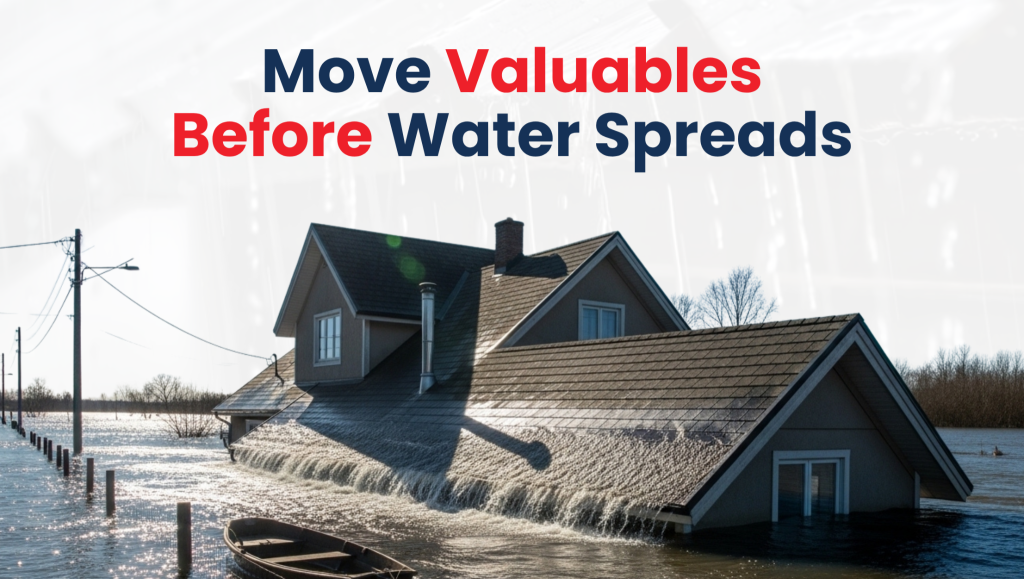
Move Everything Valuable Away from the Area
Don’t underestimate how fast a drip becomes a pour. If the leak is accelerating, as it often does during active rain, what’s a manageable drip now can become a stream within minutes if the saturated ceiling material gives way.
Move immediately:
- Electronics, laptops, TVs, gaming systems, speakers.
- Important documents, passports, and financial records.
- Furniture, especially upholstered pieces, absorbs water and grows mold fast.
- Rugs and flooring materials you can lift.
- Artwork, photographs, anything irreplaceable.
Lay down plastic sheeting or garbage bags on the floor before placing buckets, water splashes and spreads further than the bucket footprint.
Taking these steps early can significantly reduce repair costs and protect valuable belongings while you arrange professional water damage restoration services in Washington, D.C. to assess the damage, prevent mold growth, and restore your property safely.
Get People and Pets Clear
If the leak is near any light fixture, ceiling fan, or electrical outlet, treat that area as potentially dangerous and keep everyone away from it. Water and electricity in proximity is a genuine hazard, not a theoretical one. If you notice flickering lights, sparking, or a burning smell near the leak area, cut power to that circuit at the breaker immediately.
If the ceiling is visibly sagging significantly ,a large bubble or section that’s bowing downward under water weight ,stay out of that room entirely until it’s addressed. A saturated section of drywall can weigh hundreds of pounds.
Minutes 10–20: Control the Water
Place Buckets Strategically
This sounds obvious but there’s a technique to it. Place your primary bucket directly under the drip, then place secondary containers in a ring around it ,because when the ceiling finally releases, water fans out rather than falling straight down.
If you have a large plastic storage bin, use it instead of a bucket. More surface area catches splashing and gives you more time before emptying.
Change or empty buckets before they overflow. An overflowed bucket does more damage than a controlled drip.
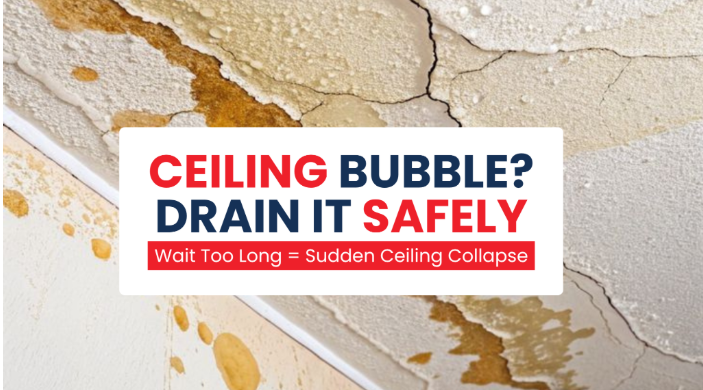
Puncture Ceiling Bubbles ,Don’t Wait for Them to Burst
This is the step most homeowners are afraid to do, but it’s one of the most important actions you can take.
When water pools above your drywall ceiling, it creates a bubble ,a visibly sagging, water-filled pocket in the ceiling material.
The instinct is to leave it alone. Don’t. That bubble is going to burst on its own terms, which means it releases all at once, takes a large section of ceiling with it, and drops potentially gallons of water onto your floor, furniture, and electronics.
How to do it safely:
Get a bucket in position first. Then use a screwdriver or a thin nail to puncture the lowest point of the bubble. Make the hole small ,you want to drain it in a controlled stream, not trigger a collapse. Have a second person hold the bucket if possible. Once drained, the ceiling material may be salvageable ,a controlled puncture causes far less structural damage than a burst.
If there are multiple bubbles, address the largest ones first.
Protect the Floor
Water that reaches hardwood flooring causes warping within hours. Water on laminate causes swelling and delamination. Lay down towels, plastic sheeting, or even garbage bags between the bucket area and the floor if you haven’t already. Old blankets under a plastic sheet work well ,they absorb splash and protect the floor simultaneously.
Minutes 20–35: Document Everything
Why Documentation Matters Right Now
If your leak was caused by a storm, wind event, or other covered peril, you may have a valid insurance claim. The documentation you create in the next fifteen minutes is the foundation of that claim. Photos taken before any cleanup or repair are significantly more valuable to an adjuster than photos taken after.
Do not clean up, throw anything away, or start repairs before you document.
What to Photograph and Video
Inside:
- Every water stain on the ceiling, including faint or peripheral ones
- The active drip or leak point from multiple angles
- Any bubbling, sagging, or damaged ceiling material
- Water on the floor, furniture, or belongings
- Any damaged electronics or personal property
- The bucket and surrounding wet area to establish scale
Outside (if safe ,do not get on the roof):
- The roof surface from ground level, as many angles as possible
- Any visible damage ,missing shingles, damaged flashing, debris impact points
- The gutters and downspout area
- Any storm damage context ,fallen branches nearby, debris on the property
Timestamp everything. Make sure the date and time stamp is active on your phone camera. If you can, screenshot a weather service showing current storm conditions ,Weather.gov is reliable and free. That weather record connects your damage to a specific event, which matters enormously for insurance purposes.
Write Down What You Observed and When
Take thirty seconds to send yourself a text or email noting: when you first noticed the leak, what weather was occurring, how quickly it progressed, and what areas are affected. This creates a timestamped written record that supplements your photos.
Minutes 35–45: Check for Electrical Hazards
Before you go any further ,especially before you start moving through the affected area more extensively ,do a systematic check for electrical danger.
Warning signs that water has reached your electrical system:
- Lights flickering or dimming in the affected zone
- A ceiling light fixture that has water visible inside it or dripping from it
- Discoloration, rust staining, or water tracks around a light fixture or outlet
- A burning smell or ozone odor ,this is the smell of electrical arcing
- Breakers tripping repeatedly in the zone where the leak is occurring
If you see any of these signs:
Go to your electrical panel and cut power to the affected circuit. If you’re not sure which breaker controls the affected area, cut all circuits in that zone ,or cut the main breaker if the situation is serious enough. Label the breakers you’ve cut so no one resets them accidentally.
Do not restore power to those circuits until a licensed electrician has inspected the wiring. This is not an overreaction ,water in electrical systems causes fires, sometimes hours or days after the initial exposure when drying creates arc conditions.
Read our guide on what happens if you ignore a roof leak for a detailed breakdown of how water damage escalates, including the electrical hazard stage.
Minutes 45–60: Make the Call ,And Know What to Say
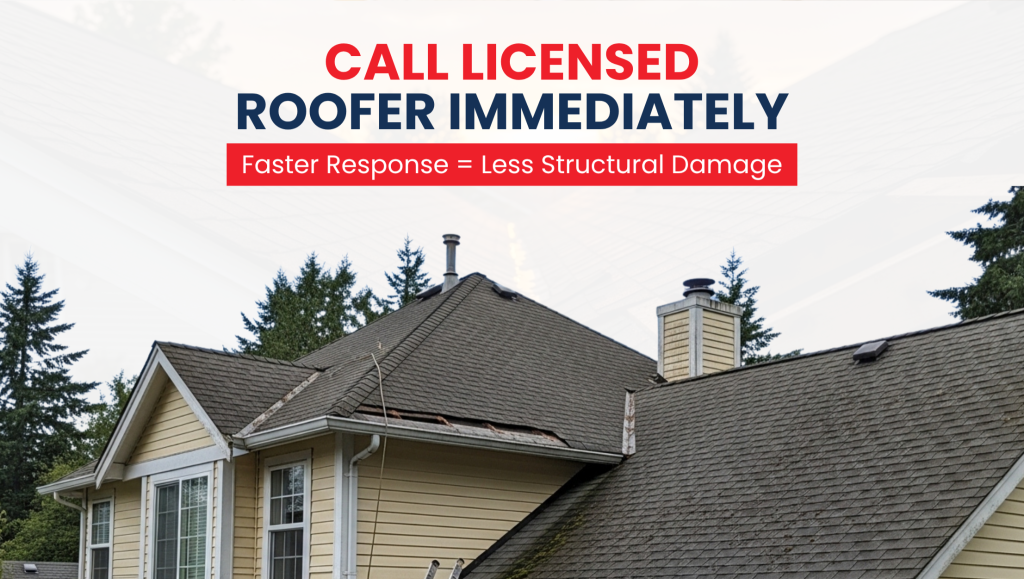
Call a Licensed NJ Emergency Roofer
This is the point in the hour where you pick up the phone. Not tomorrow. Not after the rain stops. Now ,because emergency repair services can get a tarp on your roof during or immediately after a storm, which stops the water entry at the source rather than just managing it inside.
When you call, be ready to tell them:
- Your address and the best way to access the roof
- When the leak started and what triggered it (storm, no obvious cause, etc.)
- Where the water is entering inside ,ceiling, wall, attic
- Whether there’s any electrical concern
- Whether the ceiling is sagging or if there’s been a collapse
- What your roof type is if you know it ,shingle, flat, metal
A reputable NJ roofer offering emergency service will ask most of these questions themselves. The answers help them arrive with the right materials and know what they’re walking into.
What emergency service typically involves:
A licensed roofer will do a rapid assessment of the entry point ,usually from inside the attic first, then the roof surface ,and apply a temporary fix to stop active water entry. This is most commonly a heavy-duty roof tarp secured properly over the damaged area, or in some cases emergency sealant on a specific failure point like a cracked pipe boot or separated flashing.
A tarp is not a permanent repair. It’s a bridge that stops the bleeding while a full assessment and permanent repair is scheduled. Don’t let anyone tell you a tarp is all you need and leave it at that.
If You Can’t Reach a Roofer Immediately
If you’re in a major storm event where roofers are backed up ,which happens after nor’easters and significant wind events across Bergen, Essex, Morris, Hudson, and Passaic counties ,here’s what you can do yourself while you wait:
From the attic (if safe to access):
If you can safely get into the attic, place a piece of plywood over the entry point from below and nail a tarp or plastic sheeting over it. This is not a roof repair ,it’s an interior barrier that slows water entry until a professional can get there.
From outside (ground level only ,do not get on the roof in rain or wind):
If a section of shingle or flashing has visibly blown off and you can see it from the ground, do not attempt to reattach it yourself during a storm. Wait for conditions to be safe before any roof access.
Use roofing cement or emergency sealant only if:
You can safely access the specific problem area on a dry, stable day ,not during active rain ,and the failure point is a small, clearly defined gap or crack. Roofing cement applied incorrectly to a large or unclear area can trap moisture and make diagnosis harder for the roofer who comes after you.
After the Hour: What Comes Next
Once you’ve stabilized the situation ,water controlled, damage documented, emergency roofer called ,here’s what the next 24–48 hours should look like:
Get a full professional assessment in writing. Not just a verbal estimate ,a written scope of damage that identifies the entry point, the extent of affected materials, and the full repair required. This document is essential for insurance purposes.
Contact your insurance company ,but read this first. Before you call your insurer, review our guide on whether roof leak repair is covered by homeowners insurance in NJ. Understanding what’s covered, what’s excluded, and how to frame your claim before you make that call can be the difference between a paid claim and a denial.
Don’t start interior repairs yet. It’s tempting to immediately patch the ceiling or rip out wet drywall. Wait until the roof repair is confirmed complete and the entry point is sealed. Repairing interior damage before the roof is fixed means repairing it twice.
Monitor the area after the first rain following repair. The first rain after an emergency repair is your test. Stay vigilant ,check the attic and affected ceiling area during and immediately after rainfall to confirm the repair held.
What NOT to Do in the Next 60 Minutes?
Just as important as the action steps ,here’s what to avoid:
Do not get on the roof during active rain or wind.
This is the single most dangerous thing a homeowner can do. Wet roofs are slippery, damaged sections may not hold weight, and storm conditions add wind instability. Every year NJ homeowners are seriously injured falling from roofs during or after storms. The roof can be assessed when conditions are safe.
Do not ignore the leak and hope it stops.
Every rain event that passes through an open entry point adds to the damage load. Materials that might have dried out and been salvageable after one exposure are destroyed after three.
Do not start pulling up shingles or cutting into the roof yourself.
DIY roof access during an emergency almost always makes the professional repair more complicated and expensive. You may inadvertently disturb materials adjacent to the actual problem, making it harder for the roofer to diagnose the true entry point.
Do not throw away damaged materials before documenting them.
Wet insulation, damaged drywall, soaked ceiling tiles ,these are evidence for your insurance claim. Photograph everything before disposal.
Do not sign anything on the spot from a contractor who showed up at your door uninvited?
Storm chasers follow major weather events across NJ. If someone knocks on your door within 24 hours of a storm and asks you to sign an Assignment of Benefits agreement, close the door. Read our guide on how to choose a roof leak repair contractor in NJ before hiring anyone under pressure.
60-Minute Action Checklist
Print this or screenshot it for reference:
Minutes 0–10:
- Move electronics, valuables, and irreplaceable items away from the affected area.
- Check for electrical hazards ,flickering lights, burning smell, water near fixtures.
- Cut power to affected circuits if any electrical concerns exist.
- Get people and pets clear of severely sagging ceiling areas.
Minutes 10–20:
- Place buckets ,primary under the drip, secondary around it.
- Puncture large ceiling bubbles in a controlled way before they burst.
- Protect flooring with plastic sheeting or towels under bucket area.
Minutes 20–35:
- Photograph and video everything ,ceiling, drip point, floor, exterior from ground.
- Screenshot weather data showing current storm conditions.
- Send yourself a timestamped text or email noting what you observed and when.
Minutes 35–45:
- Do a full electrical check of the affected zone
- Cut power to any circuits showing warning signs
- Do not restore power until a licensed electrician clears it
Minutes 45–60:
- Call a licensed NJ emergency roofer.
- Have your address, damage description, and roof type ready.
- If lines are busy, leave a voicemail and call the next option ,don’t wait for a callback before trying others.
Helpful Pages on NJRoofLeakExperts.com
- Emergency Roof Leak Repair NJ ,Our emergency response service across NJ; call us first.
- How to Find the Source of a Roof Leak in Your NJ Home ,Once conditions are safe, use this to help locate the entry point.
- Why Is My Roof Leaking? 10 Most Common Causes in NJ ,Understanding the cause shapes the repair and the insurance claim.
- What Happens If You Ignore a Roof Leak? ,What’s at stake if the next hour doesn’t go well.
- Is Roof Leak Repair Covered by Homeowners Insurance in NJ? ,Read this before calling your insurer.
- How to Choose a Roof Leak Repair Contractor in NJ?, Don’t hire the first person who knocks on your door after a storm.
- Roof Flashing Repair NJ ,One of the most common emergency leak sources in NJ homes.
- Chimney Leak Repair NJ ,Chimney failures are a frequent cause of sudden active leaks.
- How Much Does Roof Leak Repair Cost in NJ? ,Know what fair emergency repair pricing looks like.
The Bottom Line
An active roof leak is an emergency ,but it’s a manageable one if you act systematically in the first hour. Protect people and property first, control the water second, document everything third, address electrical hazards fourth, and get a licensed NJ roofer on the phone before the hour is up.
The actions you take ,or don’t take ,in the next sixty minutes will determine whether this is a repair or a renovation.